[Day 36] Intro to PyTorch
안녕하세요?
오늘은 Day 36입니다!
Tesla autopilot and ChatGPT apparently use PyTorch, so for some time I have been wanting to see what PyTorch is like. Given that I wanna go deeper into computer vision and self-driving cars, I wanted to "get my hands dirty".
1) IBM's DL with PyTorch
I did IBM's DL with PyTorch and it was good, but not very practical. It assumes I have no DL knowledge, but it was not that bad, just a refresher on loss, activations, back and forward prop, gradient descent, etc.
파이토치의 라이브러리는 텐서플로보다 더 직접적으로 다 정의해야 하는 것이다. 어떤 단순한 것에 적용해야지 ~ 라고 생각했다
2) PyTorch Project: Handwritten Digit Recognition
그래서 이 분의 튜터리얼 프로젝트를 딸랐다
사실 이 2023년 여름에 머신러닝 처음 공부했을 때 이 분의 채널은 도움이 굉장히 되었다. knn, linear regression, logistic regression, 의사결정나무 등등 초보자 위한 튜터리얼 프로젝트들이 너무 좋다 ~
텐서플로와 차이점


그 다음에
3) Facial Expression Recognition with PyTorch 및 Deep Learning with PyTorch : Object Localization
여기에서는 transfer learning으로 모델을 만들어 봤다. 두 번째 프로젝트는 야채나 사과의 bounding box 모델 구성했다. 첫 번째 모델이 좀 더 재미있었다. 이 두 가지 프로젝트는 이미 구성된 모델을 사용했는데 훈련과 검증을 파이토치로 어떻게 하는지 조금이나마 더 깊게 이해했다
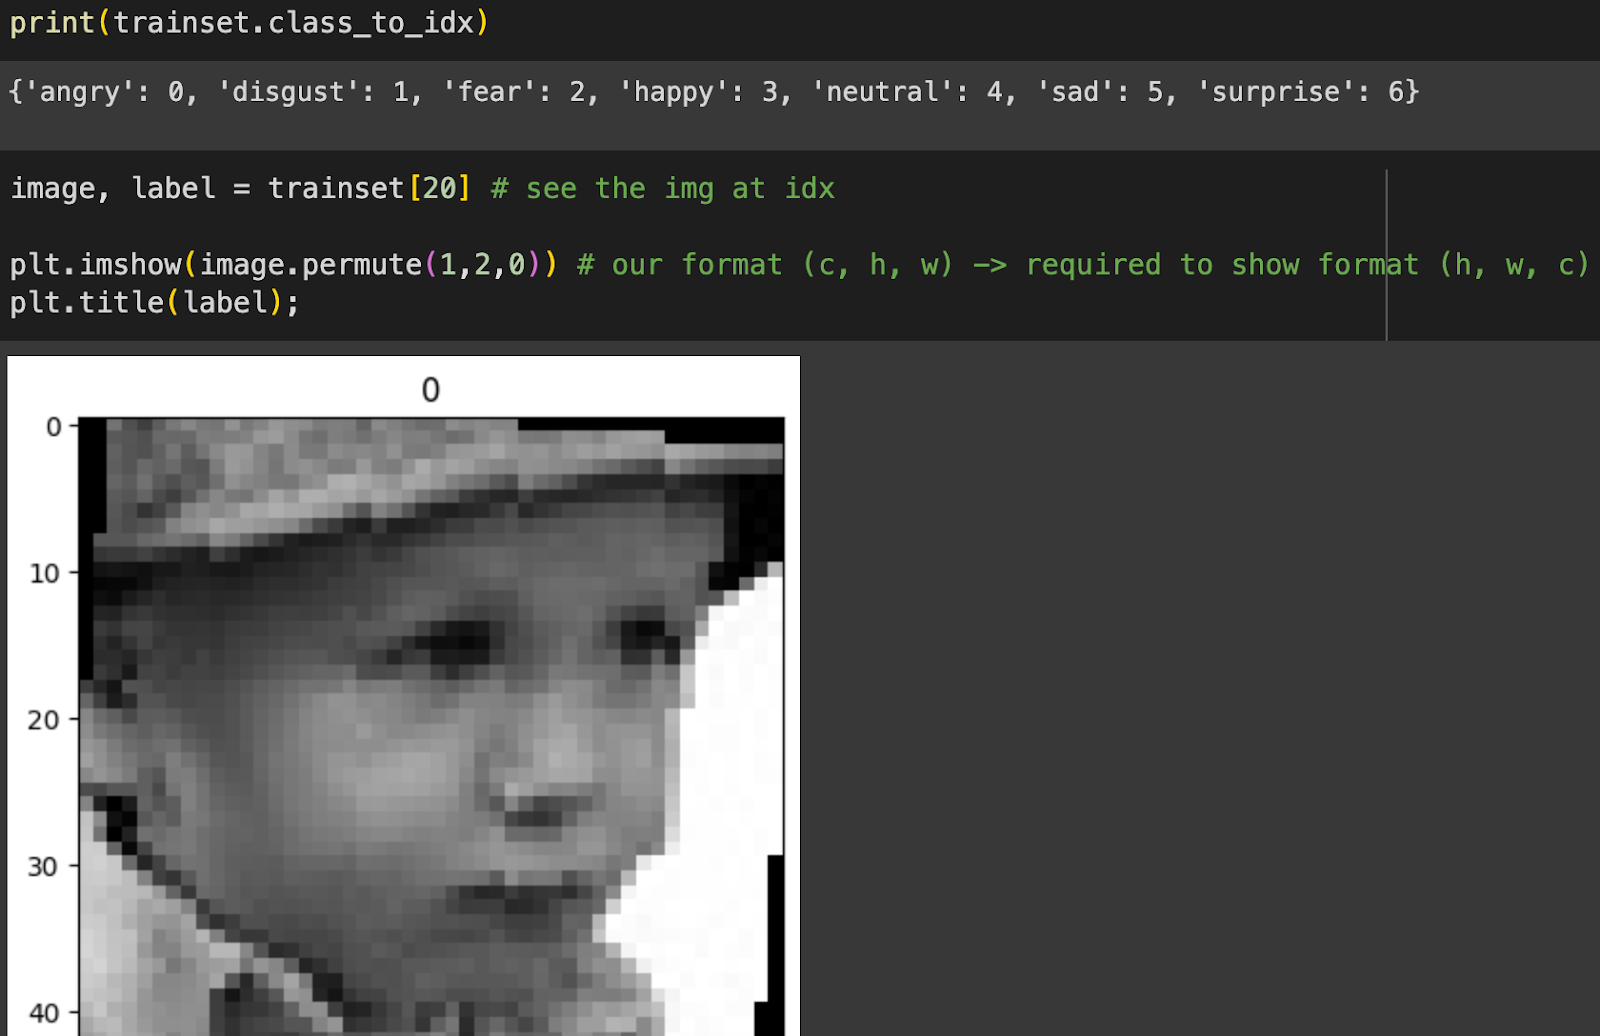
얼굴 표현 모델이 다음과 같은 데이터를 사용했다


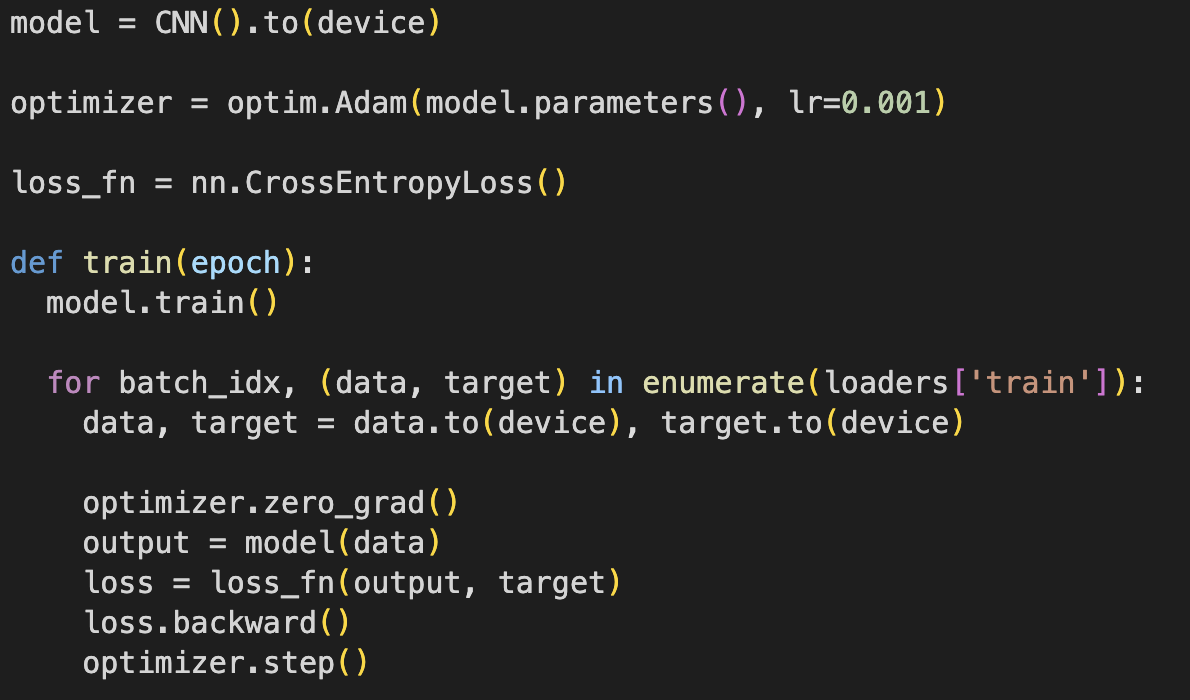
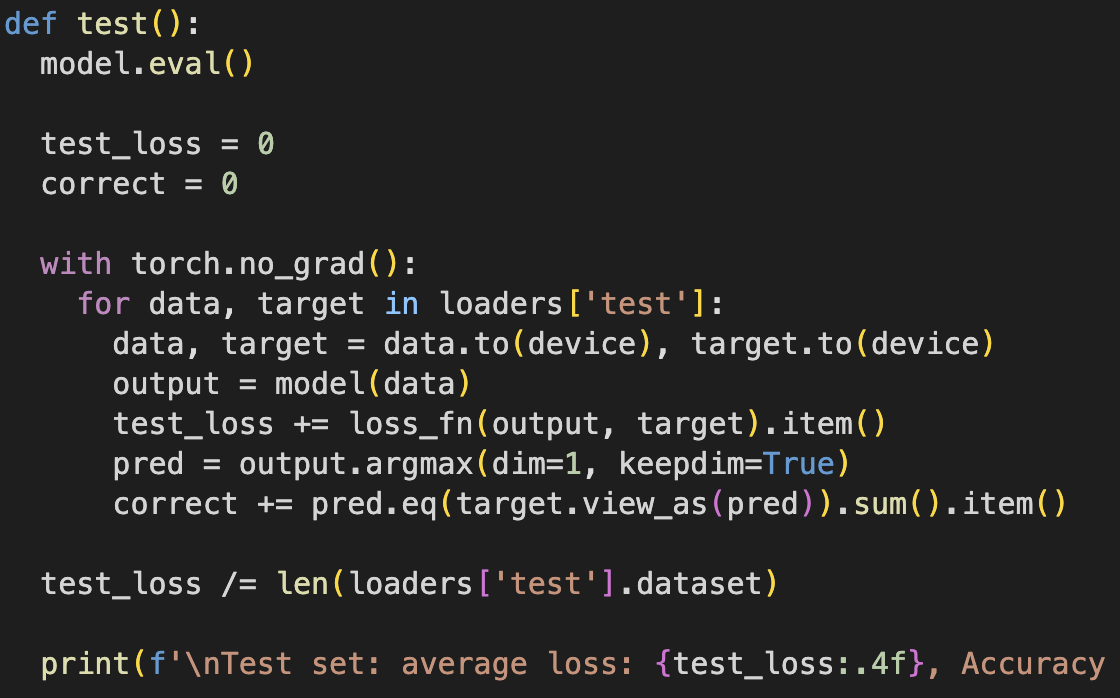
훈련 다음과 같다


결과를 보면 각 이미지의 class의 probability 볼 수 있다

오늘의 공부한 내용이 재미있는데 내일, 다른 데이터로 제가 직접 파이토치 모델을 만들어 보겠습니다!
오늘은 여기까지입니다!
내일 뵐게요 ~

